This guide will walk you through adjusting wheel positions on inline skates with either 3 or 4 wheels. The front and rear wheels often show more wear compared to the middle ones, and the wear differs between the left and right skates. By correctly reorganising your wheels, you can enhance their performance and extend their lifetime.
The strategies provided here are helpful guidelines. They are straightforward yet efficient for maintaining an even wheel setup and prolonging wheel durability. There are multiple techniques to adjust wheels on inline skates, and you will likely discover your own preferences as your skill and technique develop.
Overview
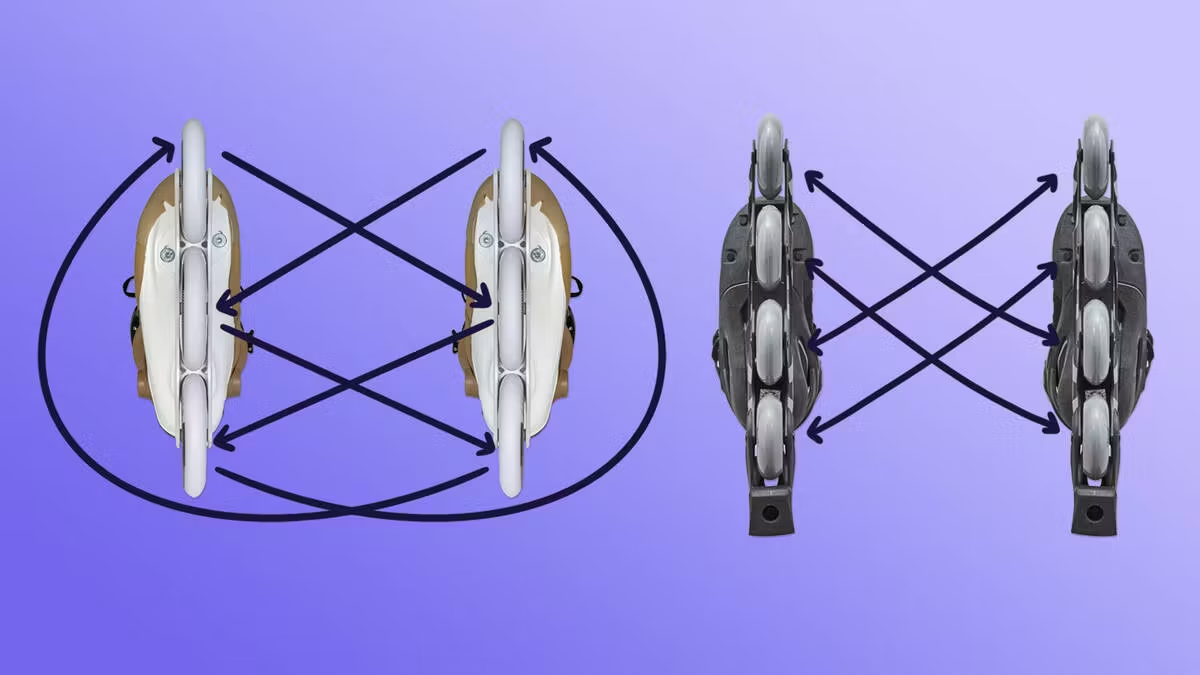
Steps for Rotating Wheels on 4-Wheel Inline Skates

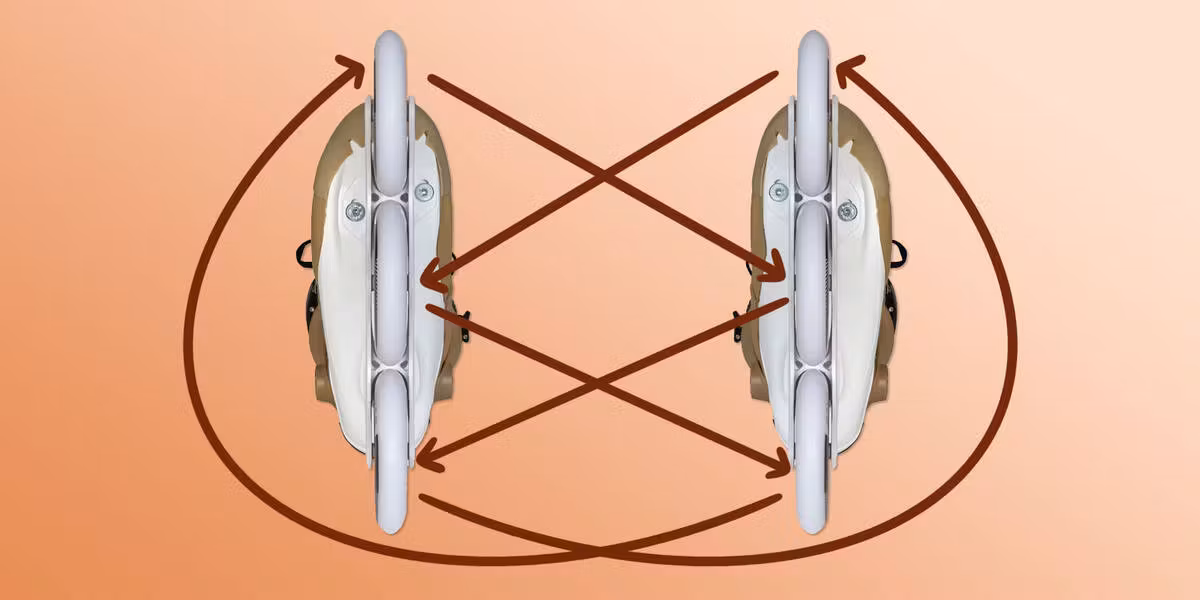
The typical approach for rearranging wheel positions on 4-wheeled inline skates involves exchanging the two back wheels of one skate with the two front wheels of the other skate. This is illustrated in the above image.
To avoid confusion, attach a small piece of masking tape to each wheel and label its original position.
Original wheel positions:
| Left skate | Right skate |
| 1 Left | 1 Right |
| 2 Left | 2 Right |
| 3 Left | 3 Right |
| 4 Left | 4 Right |
Wheel positions post-rotation:
| Left skate | Right skate |
| 3 Right | 3 Left |
| 4 Right | 4 Left |
| 1 Right | 1 Left |
| 2 Right | 2 Left |
- Note: Make sure to flip each wheel. If they were facing outwards prior to rotation, they should face inwards when refitted.
Process for Rotating Wheels on 3-Wheel Inline Skates
The approach depicted above is a useful method for altering wheel positions on 3-wheeled inline skates. The aim is to distribute wear evenly across all six wheels for prolonged use.
There are diverse practices for rotating wheels on 3-wheeled skates. Beginners to triskates might find the rotation pattern outlined below a suitable initial guideline.
Use masking tape on each wheel, marking their initial positions to prevent any mix-ups.
Original wheel positions:
| Left skate | Right skate |
| 1 Left | 1 Right |
| 2 Left | 2 Right |
| 3 Left | 3 Right |
Wheel positions post-rotation:
| Left skate | Right skate |
| 3 Right | 3 Left |
| 1 Right | 1 Left |
| 2 Right | 2 Left |
- Note: Ensure each wheel is flipped. If the graphics faced outward before, they should be oriented inward when repositioned.
Essential Tools for Adjusting Inline Skate Wheels
A 4 mm Allen key or Torx tool is required for the removal and reattachment of the wheels. You will often need two tools—one for each side of the wheel—to hold both the male and female ends of the wheel bolts simultaneously.
Skate tools are extremely practical for changing wheel positions on inline skates, as they generally include everything necessary for assembling and disassembling skates. Locate one here:
For instructions on removing wheels, refer to this guide:
Frequency of Rotating Inline Skate Wheels
How often you should switch your wheels will depend on the frequency of skating, the surfaces skated on, and your technique.
It’s time for rotation when the centreline deviates from the middle. Some skaters might need to rotate wheels after each session, while others might only need to do so a few times per season.
Once you're accustomed to it, the process takes merely five minutes.
To determine whether new wheels or skates are needed, consult this guide: